Blueprinting
What's it all about?
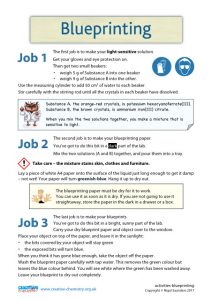
Blueprinting paper is photosensitive. Objects put onto it will block sunlight, leaving the paper unchanged there. Where the sunlight can get to the paper, an intense blue colour develops. The blue colour will not wash out of the paper, but the greenish colour left under the object will. This leaves a white image of the object on a blue background.
A blueprinting mixture is very easy to set up. Many plain papers will successfully take up this mixture.
Lots of things can be blueprinted, such as pens, rulers and protractors, with great results. You can experiment with cut-out messages and pictures, and even get different shades using masks and different exposure times.
It works even on an overcast day in Yorkshire!
Student notes
These can be carried out on separate days if required.
Making the blueprinting paper
Put your gloves and eye protection on. Then get two small beakers:
- weigh 5 g of Substance A into one beaker
- weigh 9 g of Substance B into the other beaker.
Use the measuring cylinder to add 50 cm3 of water to each beaker. Stir carefully with the stirring rod until all the crystals in each beaker have dissolved.
Do the next bit in a dark part of the lab.
Mix the two solutions (A and B) together, and pour them into a tray. Lay a piece of white A4 paper onto the surface of the liquid just long enough to get it damp – not wet! Your paper will turn greenish blue. Hang it up to dry out.

When you think the paper has gone blue enough, take the object off the paper.
Wash the blueprinting paper carefully with tap water. This removes the green colour but leaves the blue colour behind. You will see white where the green has been washed away.
Leave your blueprint to dry out.
Teacher Guide
Activity notes
Making the blueprinting paper


This stage should be done away from direct sunlight, ideally in a semi-dark lab. Two solutions need to be made:
- substance A: 5 g of potassium hexacyanoferrate(III) dissolved in 50 cm3 of water
- substance B: 9 g of ammonium iron(III) citrate dissolved in 50 cm3 of water.
The two solutions are named as A and B just to make the method easier for the students to follow.
The two solutions should be mixed together and poured into a tray. Plain A4-sized paper is then floated on the surface. A wide range of paper types seem to work, but avoid very shiny paper or very coarse paper. It works best if the tray is gently swirled to cover all the underside of the paper, without prodding it with fingers and pens! The paper should then be hung up to dry in a dark part of the lab, and then left flat in a drawer or a lightproof box.
Making a blueprint
When the students are ready, they should arrange their objects or paper cut-outs on the blueprinting paper. The paper must be dry – it doesn’t work if the paper is damp.
The assembly can then be left in sunlight on a bench to develop. It helps if a sheet of glass is placed onto to keep it all flat. After the blue colour develops, the paper is then washed with clean tap water to remove the undeveloped green colour, and then left to dry.
In good light, the blueprint develops within a minute or two to give a sharp image. On dull days, the exposure time needed is much longer, and produces a shadowy effect due to the movement of the sunlight.
![]() Health and Safety
Health and Safety
When considering carrying out a practical activity with a class, you must check your local health and safety rules. Make an appropriate risk assessment and try the activity yourself first.
Irritating to the skin and eyes.
Stains skin and clothes. Wear protective clothing (e.g. a lab coat), gloves and eye protection. Protect surfaces using old newspapers or similar.
Technician notes
Per group of students:
- 2 × 150 cm3 beakers
- 1 × 100 cm3 measuring cylinder
- 1 × glass rod
- 1 × plastic tray
- 1 × wash bottle containing deionised water
- about 20 sheets of plain A4 paper (or a size appropriate to the tray)
In the lab:
digital balance, precise to ±1 g or ±0.1 g
spatulas
potassium hexacyanoferrate(III) – labelled as ‘Substance A – Irritant’
ammonium iron(III) citrate – labelled as ‘Substance B’
drying line with bulldog clips


