Spooky alien masks
What's it all about?
My son needed to make a minotaur mask for his school assembly. Rather than just use card or paper, we made a mask using plaster of Paris. This was great fun, and the ‘minotaur’ certainly scared the audience!
The method itself is very simple, but patience is needed to get a good, strong mask. The activity will fit into three consecutive days, but it could also be done over several weeks as part of a club activity.
Student notes
There are three parts to making a Spooky Alien Mask:
- making a base mask to fit your face
- building the alien features
- decorating the mask for that authentic extraterrestrial look!
Making a base mask
You are going to make your very own Spooky Alien Mask. Once the first stage has been finished, it will be up to you to decide how it will look. Will yours glow in the dark? Will have hideous flappy bits on it, or will it be a cool, friendly alien? Only you can decide!
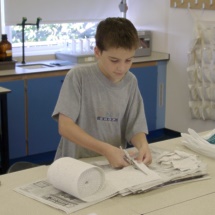
First, you need to make a mask that will fit snugly onto your face. You need a partner for this stage. Once your mask has set, you can build the alien features onto it.
Cut the plaster bandages into strips about 2 cm × 8 cm.
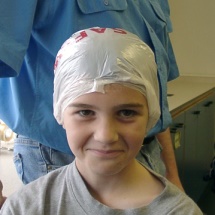
Get a bowl of warm water. Prepare yourself. Put an old shirt on, and sit down with your head tilted back.
Your partner needs to put a plastic bag over your hair, and seal it tight around your forehead and the sides of your face.
Then they have to smear petroleum jelly (Vaseline®) over your face. This must go over your eyebrows but not in your mouth, nose or eyes.
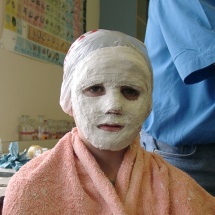
Your partner needs to start putting strips of bandage over your face. They need to do this carefully, one strip at a time. They should dip a strip in the warm water, rub it slightly, then put it on your face.
To build a good, strong base mask, your partner should:
- start on your forehead, and work around the side of your face
- not go under your chin
- work carefully around your eyes, nostrils and mouth
- make sure the strips overlap and are smoothed down
- cut the strips into smaller pieces or special shapes if needed
- aim to get two or three layers onto your face, especially at the edges.
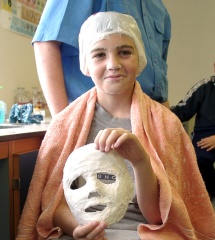
Once the layers have been put on, you need to relax for about 5 minutes to give the plaster time to set. It’s going to get warm! Meanwhile, your partner should clean up – no plaster down the sink!
When the plaster has set, your partner needs to gently ease the mask off your face. Put the mask down carefully and don’t fiddle with it. It needs a day to set completely.
You must wash your face with soap and water to get the Vaseline® off.
Building the alien features
You’ve made a base mask that fits snugly over your face. You are now going to give it that authentic extraterrestrial look by building up features on top using plaster bandages. The final touch involves paint, latex and glowing goo if you want it.
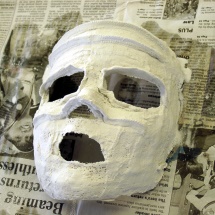
Take a pair of scissors and carefully trim any jagged edges. This is especially important around the eye and mouth sockets. Don’t get too carried away, but make sure your mask is comfortable to wear.
Build up the alien features you want with plaster bandages. Remember to do this carefully, one strip at a time. Dip a strip in the warm water; rub it slightly, and then put it on your mask.
Ideas that work well include:
- wrinkly foreheads and brows
- strange ears
- big or strange lips
- big eye sockets around your own on the mask
- a new nose to over the nostril holes
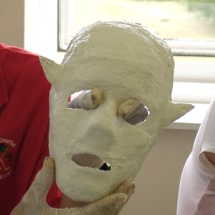
Wrinkles
Cut thin strips of plaster bandage. Wet them as usual, and lay them onto your mask. Use your finger to mould them to the shape you want. It’s often best to get each side of the mask looking the same.
Ears
Cut two pieces of thin card into the shape you want. Cut four strips of plaster bandage to the same shape, but slightly larger. Wet the bandages as usual, and put them onto the card shapes. Overlap and smooth the edges. You can get a curve to your ears if you hold them in shape for a few minutes.
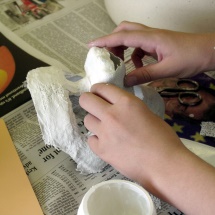
Let the plaster set for a bit, then use strips of bandage to fix the ears to the mask. You will need to hold the ears in place for a while.
Noses
There are two main ways to get a good nose. You can mould the wrinkles and new nostrils using small strips of plaster bandage. Or, you can use a plastic container (like a small sandwich box or yoghurt pot) as a mould. This lets you put a completely new nose onto your base mask (remember to leave some nostril holes in it, though!)Smear a thin layer of Vaseline® petroleum jelly on the outside of the container, and then build up two or three layers of plaster bandage on the outside. Remember to ease the container out before the plaster sets completely.
Decorating the mask
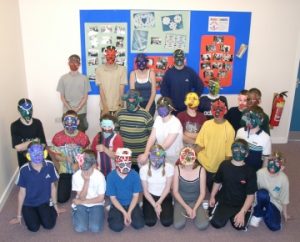
Let the mask set properly overnight. Any bits that fall off can be glued back on later, so don’t panic. Use acrylic paints to colour your mask. You can add some glowing latex later if you want.
Teacher Guide
Activity notes
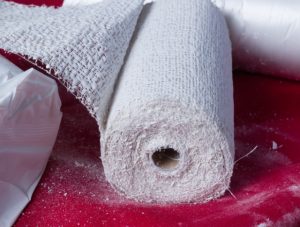
It is worth spending some time getting the base mask right. Craft shops sell rolls of plaster of Paris bandages, often called Modroc, though schools suppliers are usually much cheaper.
The model for the mask must keep still and must not laugh, and the modeller should take care to place the plaster bandages properly. It is a good idea to demonstrate the correct method to the group on a volunteer first.
As the plaster sets, it may get quite warm for the model, so they should be warned to expect this and not to get worried. The plaster will be firm enough for the mask to be removed after about 5 minutes, though it must be put aside to set overnight. It is a good time to make a hole in each side of the mask about 1 cm from the edge to take some elastic later. It is probably best that the teacher does this.
Alternatively, the teacher can use a drill to make the holes the following day. We find that one standard roll of bandage is sufficient for a child’s base mask.
When making the features on the second day, it is a good idea to encourage the students to use just one roll of bandage. This keeps the cost and the weight of the mask down.
Thin card, cut into shape, is useful as a base for complex shapes. However, a lot can be done just by shaping strips of plaster bandage carefully. If extra pieces such as snouts and ears are needed, they can be attached to the base mask with small strips of bandage. They are best attached at the end of the session, as they will often need to be held in place either by the students themselves (about 10 minutes holding time is needed), or by propping the mask and extra pieces against boxes. It is possible to glue on extra bits on the third day, but this does tend to leave visible joins.
The mask can be decorated using acrylic paints. If a very spooky alien look is required, strips of latex can be hung from the mask. The latex is prepared by dribbling liquid latex (available from craft shops) onto plastic or glass and leaving it to set.
If the mask is to be worn without holding it, a strip of dressmaker’s elastic can be knotted into each hole at the side of the mask. Alternatively, a thin band of material can be passed through and knotted.
![]() Health and Safety
Health and Safety
When considering carrying out a practical activity with a class, you must check your local health and safety rules. Make an appropriate risk assessment and try the activity yourself first.
Check for allergies to the petroleum jelly used.
The reaction of plaster of Paris with water is exothermic. The mixture can get very hot. It expands slightly then sets hard.
Do not encase any part of the body with plaster of Paris: it may become trapped and severe burns can occur as a result.
Make sure that the eyes, nose and mouth are not covered by the plaster of Paris bandage. Only apply enough layers to the face to produce a base mask.Technician notes
Per group of students:
- 1 × washing up bowl
- 2 × rolls of plaster of Paris bandages
- 2 × plastic carrier bags
- Vaseline® petroleum jelly
- Sticky tape
- 1 × pair of scissors
In the lab:
Paper towels
Soap and water
Acrylic paints and brushes
